
Recording with an ATEM Mini Pro
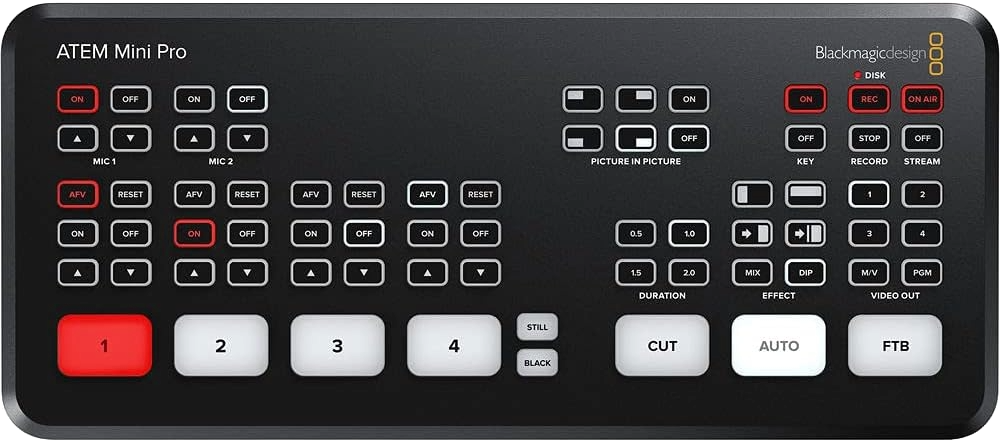
If your church is using an ATEM switcher, learning how to record to an SSD with the ATEM Mini Pro or ISO is one of the simplest ways to improve your livestream workflow. You can save your entire service directly onto a portable SSD without needing a computer to handle the recording. This makes it easier to archive your services, share them, or create clips later.
Learn more about ATEM Mini with our in-depth setup guide:
Let’s walk through it in a clear, volunteer-friendly way.
What You Need Before You Start
You’ll need:
- An ATEM Mini Pro or ATEM Mini Pro ISO
(The original ATEM Mini cannot record to USB drives.) - A USB-C SSD or fast USB-C drive.
- A properly formatted drive — exFAT or HFS+ are the supported formats.
- (Optional) A computer on the same network if you want to use the ATEM Software Control app while the USB-C port is recording.
The ATEM records H.264 .mp4 files directly onto the external SSD.
How to Record to an SSD (Step-by-Step)
1. Plug the SSD into the USB-C port
On the back of the ATEM Mini Pro/ISO, plug your SSD into the USB-C port labeled for external recording.
This is how the ATEM writes your H.264 .mp4 files.
2. Check the disk status light
Near the REC button on the top panel is the disk indicator:
- Green – drive is detected and ready
- Red – currently recording
- Slow flashing red – low disk space
- Fast flashing red – the drive is too slow or experiencing dropped frames
If you use Multiview, disk readiness and remaining recording time will also appear on screen.
3. Press REC to start and stop
- Press REC to begin recording
- Press REC again to stop
- Your file(s) will be saved on the SSD as H.264 .mp4
This works whether you are livestreaming or just recording locally.
ATEM Mini Pro vs ATEM Mini Pro ISO
(Recording Differences)
Both switchers record, but the ISO model offers deeper editing features.
| Feature | ATEM Mini Pro | ATEM Mini Pro ISO |
|---|---|---|
| USB-C recording | Yes | Yes |
| Program recording | 1x H.264 .mp4 program file | 1x H.264 .mp4 program file |
| ISO recordings (individual inputs) | No | Up to 4 HDMI inputs + program recorded as separate files |
| DaVinci Resolve project file | No | Yes – auto-generated timeline for re-editing |
The ATEM Mini Pro is perfect for recording a finished livestream.
The ATEM Mini Pro ISO is ideal if you want to re-edit later or fix mistakes in your cuts.
Choosing and Formatting an SSD
To keep things simple for volunteers, follow these recommendations:
- Choose a name-brand portable SSD with good reviews.
- Format the SSD as exFAT (best for Windows + Mac) or HFS+ (Mac).
- Keep one or two spare SSDs ready in case one fills up or fails.
- If using multiple disks, the ATEM can work with disk docks or multi-drive setups to continue long recordings.
You don’t need to know technical speeds — just use a modern SSD from a reliable brand.
Final Thoughts
Recording directly to an SSD with your ATEM Mini Pro or ISO keeps your workflow simple and reliable. Your volunteers get an easy one-button process, and your editors receive clean, ready-to-use .mp4 files each week. Once your services are stored on an SSD, you can organize them, share them with your congregation, or turn them into highlight clips for social media.
This small upgrade makes a big difference in your church’s production workflow.
Check out our related posts:
This post may contain affiliate links. As an Amazon Associate, I earn from qualifying purchases.