NDI Tools Setup
More and more camera systems now support NDI (Network Device Interface), making it one of the easiest ways to send video directly to your computer over a standard network connection. With NDI Tools, you can connect cameras and other devices without needing extra capture cards or long video cables. Many popular PTZ cameras—such as those from PTZOptics—include built-in NDI support, allowing you to power, control, and send video all through a single Ethernet cable. Best of all, NDI Tools is completely free to download for both Mac and PC, letting your computer not only receive NDI video streams but also act as an NDI source for other devices in your production system.
To download NDI Tools, first visit their website here.
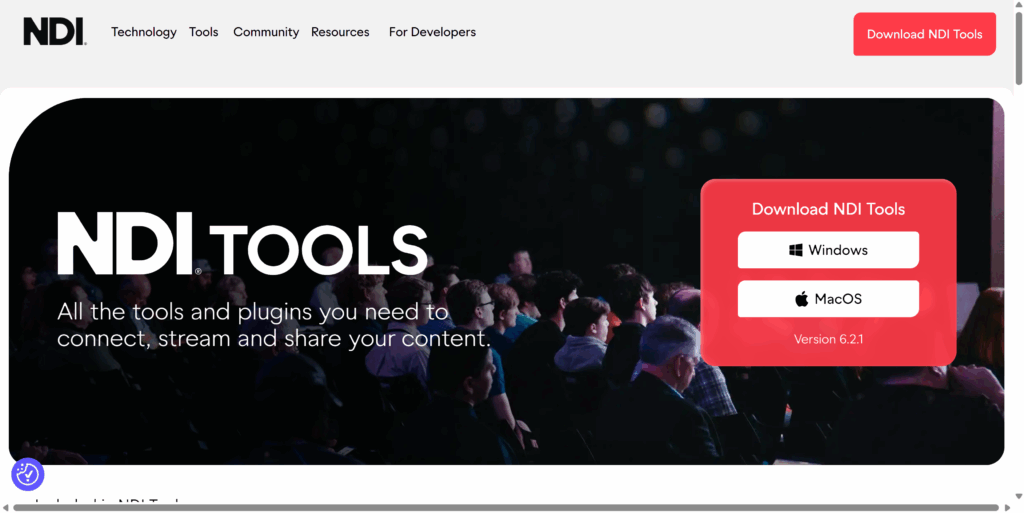
On the right side of the screen, select either “Windows” or “MacOS” depending on your operating system. NDI Tools will then download to your Downloads folder. For this demonstration, we will be using NDI Tools on Windows.
Double click to open the NDI Tools Installer.
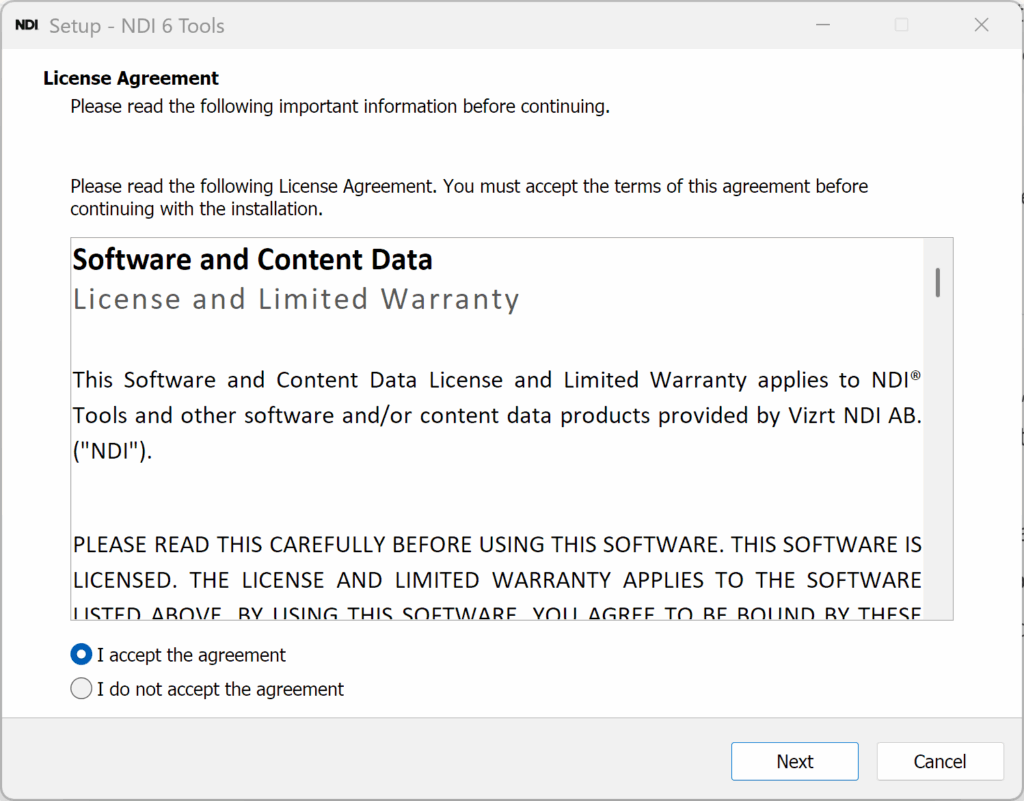
Select “I accept the agreement” and press “Next.”
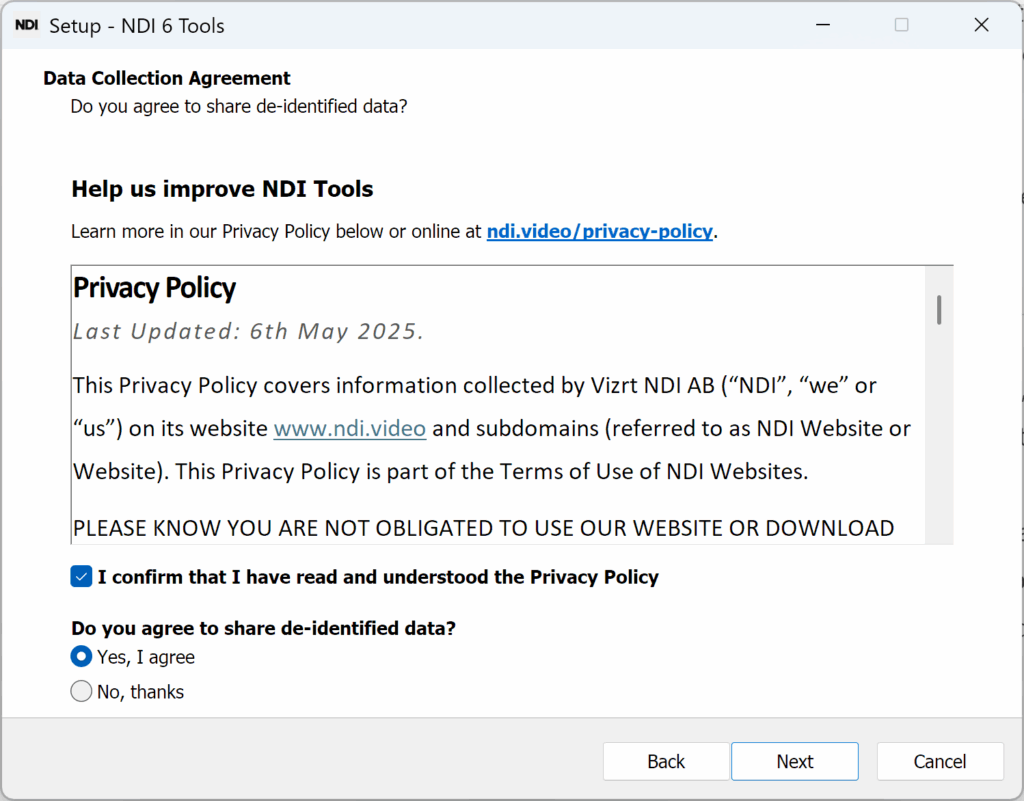
Select “I confirm that I have read and understood the Privacy Policy.”
You can choose either “Yes, I agree” or “No, thanks” for the question “Do you agree to share de-identified data?”
Select “Next” to continue.

Choose where you’d like to install the file to. You can leave this as the default.
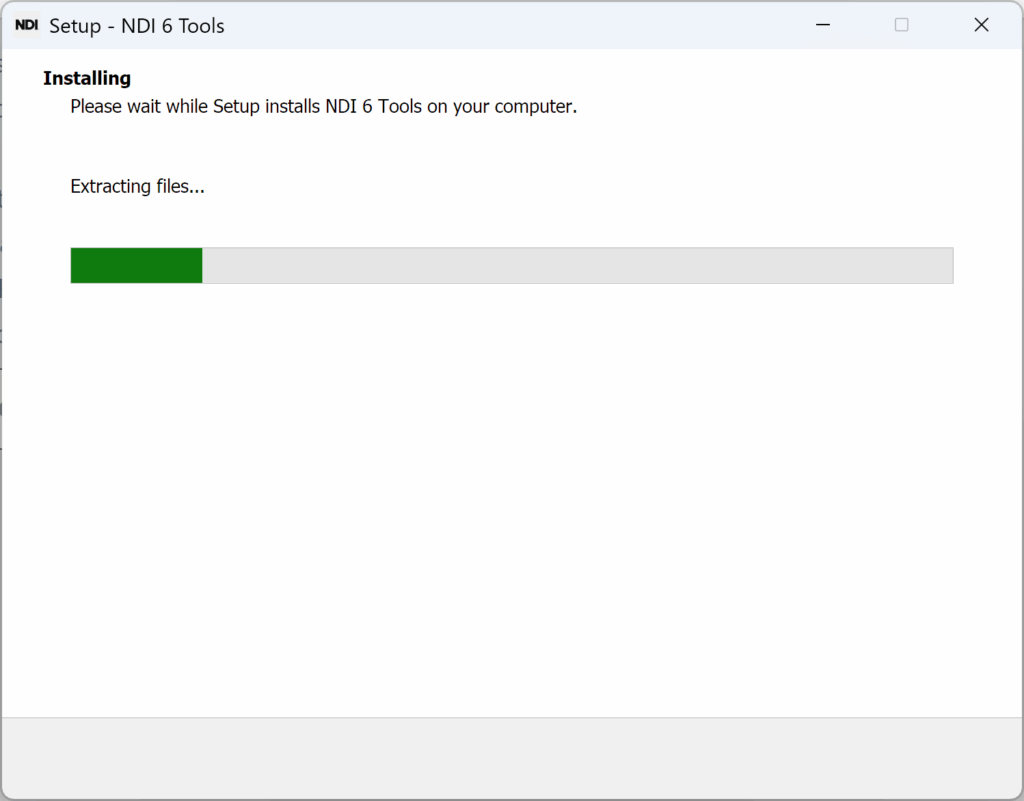
The Installer may take a few minutes to install NDI Tools.
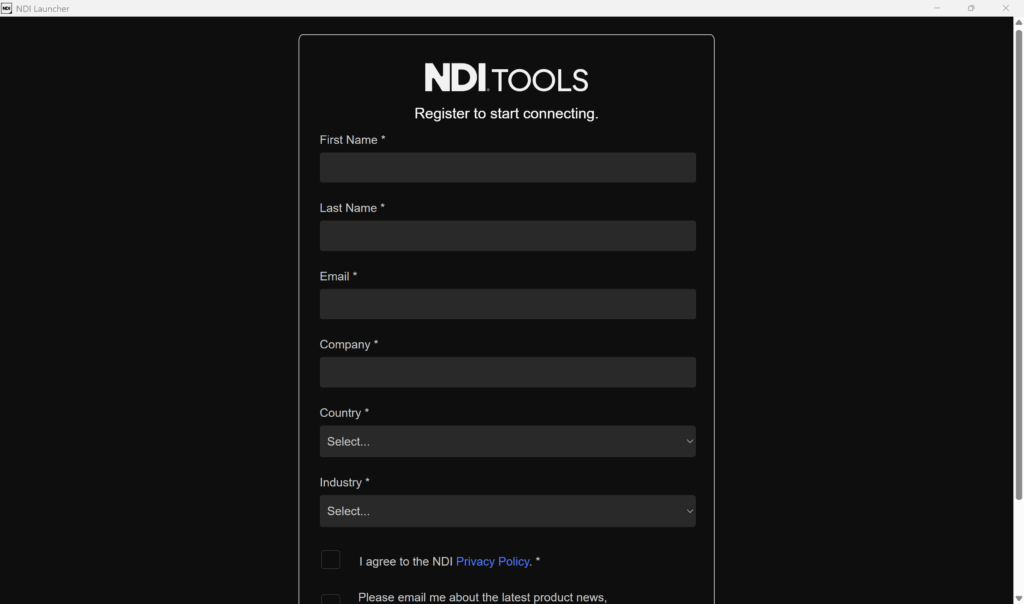
When it is finished, you will need to enter some information to register NDI Tools.
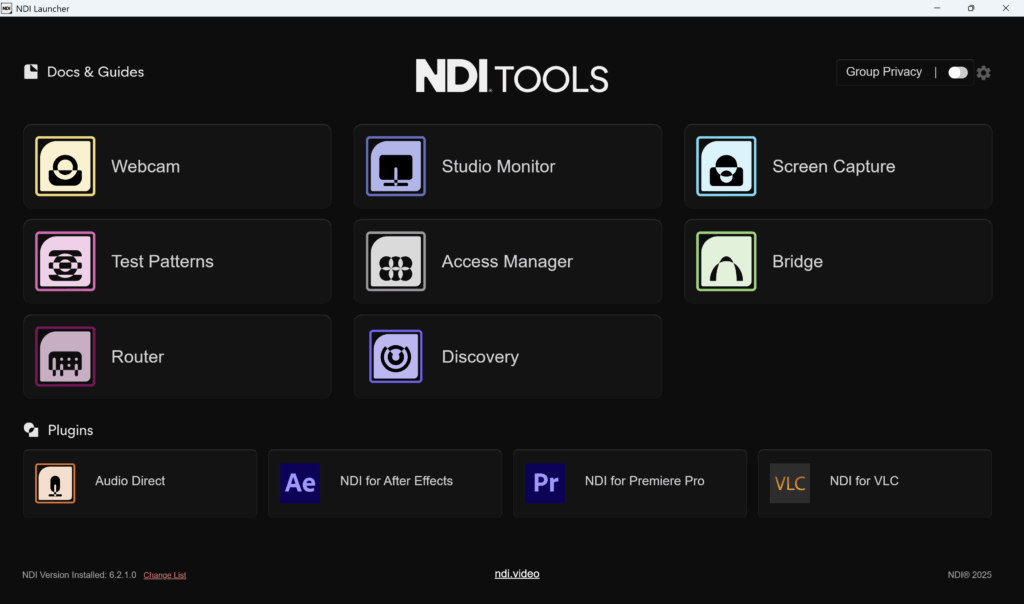
After completing the registration, you’ll gain access to the NDI Launcher, which includes several powerful tools. For this tutorial, we’ll focus on two of the most useful ones—NDI Studio Monitor and NDI Screen Capture. These tools allow you to view NDI video streams on your network and share your computer screen as an NDI source. In this demonstration, we’ll be using Windows, but the MacOS version functions very similarly. On Mac, you’ll find NDI Video Monitor instead of Studio Monitor, which offers nearly the same features with a slightly different interface.
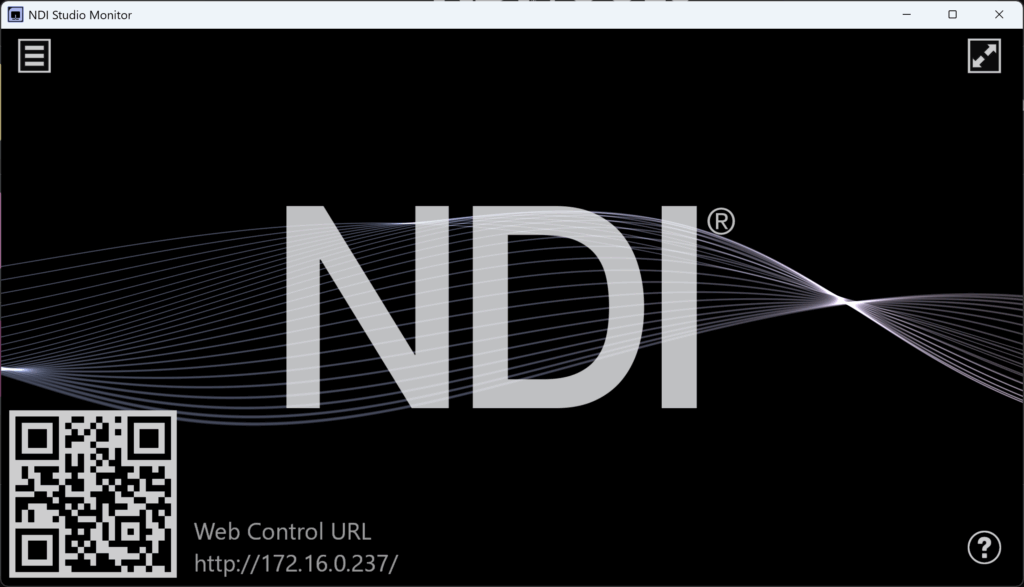
When you open NDI Studio Monitor from the launcher, you’ll see a clean interface with a live video window and simple controls. To view available NDI devices, click the three horizontal lines (menu icon) in the top-left corner.
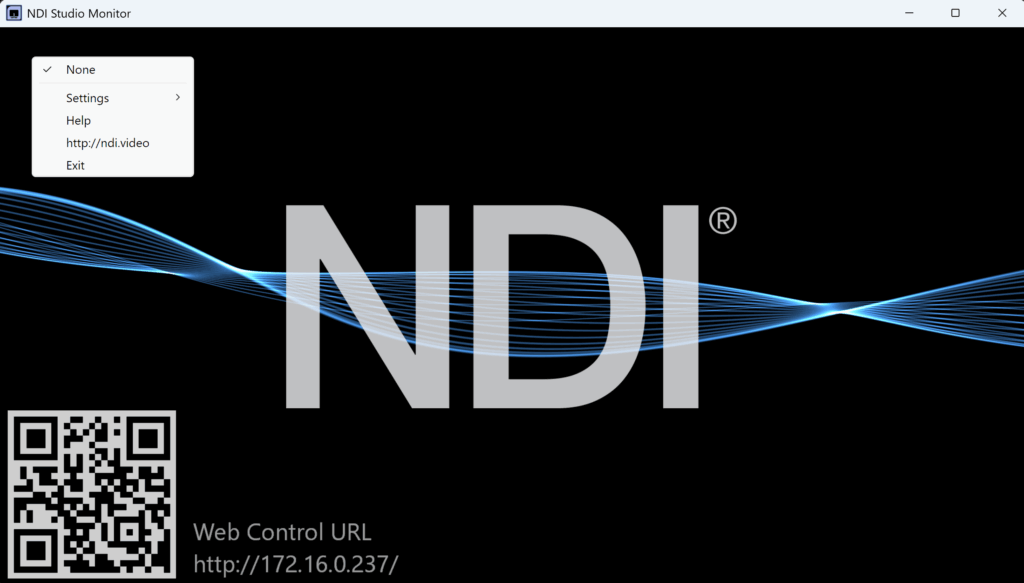
This will display a list of all active NDI sources on your network—such as cameras, computers running NDI Screen Capture, or other NDI-enabled devices—allowing you to easily select and monitor any video feed in real time.
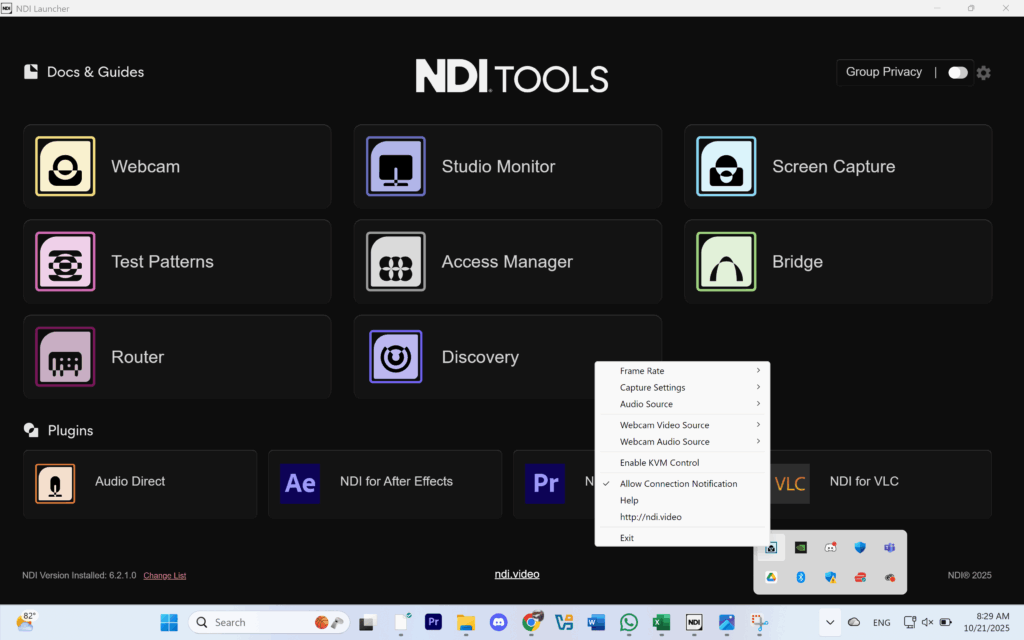
When you select NDI Screen Capture, it won’t open in a separate window. Instead, you’ll find its light blue icon in the bottom-right toolbar (on Windows). You can right-click this icon to access all available settings and options. Once enabled, Screen Capture turns your computer—or even your webcam—into an NDI video source. This feature is especially useful for sharing visuals such as PowerPoint slides, sermon notes, or song lyrics directly into your livestream or production software without needing additional hardware.
There are countless ways NDI Tools can enhance your church’s video setup. Beyond simple screen sharing or monitoring, it’s an essential companion for any system that uses NDI-enabled equipment—including PTZOptics NDI cameras, TriCaster production systems, and vMix or OBS software. These tools make it easy to preview feeds, capture screens, and route video between devices across your network without additional cabling or converters. Whether you’re managing multiple cameras, streaming to different platforms, or displaying lyrics on screens, NDI Tools provides a flexible, no-cost solution to keep everything connected. If your production system already supports NDI, this free software suite is a must-have addition to your toolkit.
Check out our related posts:
- Next-Level Switcher Showdown: Compare the TriCaster Mini S, X, and 4K for Your Church
- Camera Comparison: Canon CR-N500 vs Sony BRC-X1000 for Church Livestreams
This post may contain affiliate links. As an Amazon Associate, I earn from qualifying purchases.